Introduction
With the rise of smartphone photography, the quality of photos has become a significant factor in how we capture and share our lives. The iPhone, known for its exceptional camera capabilities, offers a range of features that enhance photo quality, including its popular Vivid HD filters. These filters can dramatically transform your images, making colors pop and adding a professional touch. But what if you don’t have an iPhone or want to apply similar effects using other devices? This article will explore how to achieve photo editing results similar to the iPhone’s Vivid HD filters using various apps and techniques.
What Are Vivid HD Filters on iPhone?
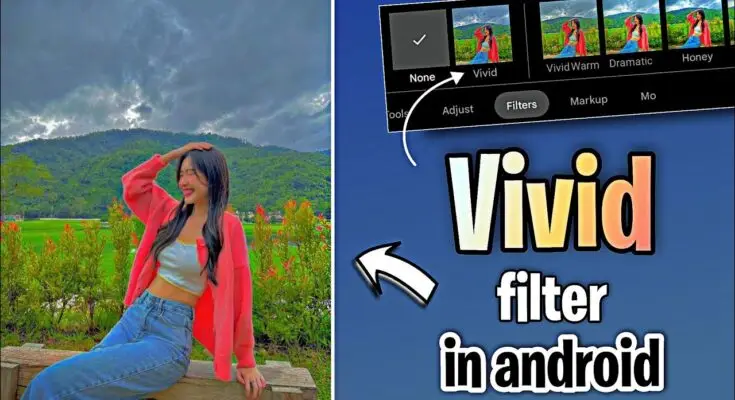
Vivid HD filters are part of the iPhone’s built-in photo editing tools, specifically designed to enhance the vibrancy and contrast of your photos. These filters intensify the colors, making them more saturated and rich, while also sharpening the details. The result is a photo that appears more lively and eye-catching, perfect for social media or personal keepsakes.
1. Color Enhancement
The primary effect of Vivid HD filters is the enhancement of colors. Reds, blues, and greens become more intense, making the image more vibrant without losing detail.
2. Increased Contrast
Vivid HD filters also boost the contrast in photos. This makes the dark areas of the image darker and the light areas brighter, creating a more dynamic range that adds depth to the photo.
3. Sharpness
Along with color and contrast, Vivid HD filters sharpen the image, bringing out finer details that might otherwise be lost. This can make textures and edges more pronounced, giving the photo a crisp, clear look.
Achieving Vivid HD Effects on Non-iPhone Devices
If you don’t own an iPhone or want to use similar effects on different platforms, several apps and techniques can help you replicate the Vivid HD filter look. Below are some popular apps and methods to achieve similar results.
Best Apps for Vivid HD Photo Editing
1. Snapseed
Google’s Snapseed is one of the most versatile photo editing apps available on both Android and iOS. It offers a wide range of tools, including filters that can mimic the Vivid HD effect.
- Steps to Apply Vivid-Like Effects:
- Open your photo in Snapseed.
- Use the “Tune Image” feature to adjust brightness, contrast, saturation, and ambiance.
- Apply the “Drama” filter, which enhances details and contrast. Adjust the filter intensity to get the desired vivid effect.
- Finally, use the “Details” tool to sharpen the image.
2. VSCO
VSCO is another powerful photo editing app known for its high-quality filters. It offers various presets that can give your photos a vibrant, detailed look similar to iPhone’s Vivid HD filters.
- Steps to Apply Vivid-Like Effects:
- Open your photo in VSCO.
- Browse through the filters and apply one that enhances color saturation and contrast. Filters like “C1” and “P5” are great starting points.
- Adjust the filter strength, contrast, and saturation to achieve a vivid look.
- Use the “Sharpen” tool to enhance details in the image.
3. Adobe Lightroom
Adobe Lightroom is a professional-grade photo editing tool available on mobile devices. It offers extensive controls over color, contrast, and detail, making it possible to replicate the Vivid HD effect precisely.
- Steps to Apply Vivid-Like Effects:
- Import your photo into Lightroom.
- Use the “Light” panel to adjust exposure, contrast, and highlights to create a dynamic range.
- In the “Color” panel, increase the saturation and vibrance to intensify colors.
- Use the “Details” panel to sharpen the image and enhance textures.
- Experiment with the “Color Mix” tool to individually adjust the saturation and luminance of specific colors.
4. Prisma
Prisma is known for its artistic filters, but it also has some filters that can enhance photos in a way that mimics the Vivid HD effect.
- Steps to Apply Vivid-Like Effects:
- Select a photo in Prisma.
- Apply one of the more subtle filters that enhance color and contrast, such as “Wave” or “Femme.”
- Adjust the intensity of the filter to retain photo realism while enhancing the vividness.
Manual Photo Editing Techniques
If you prefer more control over your edits, you can manually adjust your photos using a variety of editing tools available in most photo editing apps. Here’s how you can achieve the Vivid HD effect step by step:
1. Increase Saturation and Vibrance
Start by increasing the saturation and vibrance of your photo. Saturation boosts all colors in the image, while vibrance specifically enhances the less saturated colors, helping prevent overexposure of already vivid areas.
2. Adjust Contrast
Next, increase the contrast to create a more dynamic image. This adjustment will make the shadows deeper and the highlights brighter, adding depth to your photo.
3. Boost Clarity and Sharpening
Use clarity to enhance the mid-tones, giving your photo a more defined look. Follow this with sharpening to bring out fine details, making the image crisp and clear.
4. Fine-Tune Highlights and Shadows
Adjust the highlights and shadows to ensure that no part of your image is too dark or too light. This step is crucial for maintaining balance while still achieving a vivid effect.
5. Use the Curves Tool
If your editing app has a Curves tool, use it to fine-tune the brightness and contrast of different tonal ranges in your image. This tool allows for precise adjustments that can make your colors pop while maintaining a natural look.
Example Workflow Using Snapseed
To give you a concrete example, here’s a workflow using Snapseed to edit a photo for a Vivid HD effect:
- Open your photo in Snapseed.
- Select the “Tune Image” tool:
- Increase Saturation to about 25-35 for vibrant colors.
- Adjust Contrast to about 20-30 to deepen shadows and brighten highlights.
- Increase Ambiance slightly to enhance the overall brightness and color.
- Apply the “Details” tool:
- Increase Structure by 15-20 to bring out textures.
- Sharpen the image by 10-15 for added clarity.
- Use the “Drama” filter (optional):
- Select “Bright 1” or “Bright 2” and reduce the filter strength to around 20-30 to enhance the vividness without overdoing it.
- Export your photo:
- Once satisfied, save your photo with these adjustments.
Conclusion
Replicating the Vivid HD filter effect on your photos is entirely possible, even if you don’t have an iPhone. With the right apps and editing techniques, you can achieve stunning, vibrant images that stand out. Whether you’re using Snapseed, VSCO, Lightroom, or Prisma, the key is to focus on enhancing color, contrast, and detail to create a dynamic, professional-looking photo. By mastering these tools and techniques, you can bring your photos to life, making them as captivating as those edited with an iPhone’s Vivid HD filter.